 |
Adult DMC Videos? Buying Them Will Help to Save The Vixen! |
|
|
|
|
Adult DMC Videos? Buying Them Will Help to Save The Vixen! |
|
|
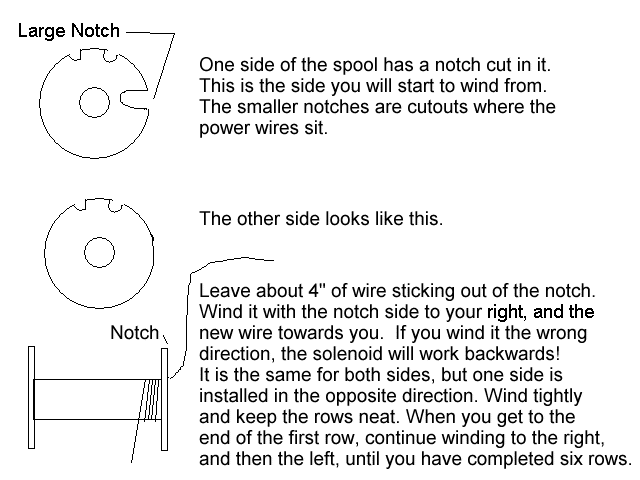
Rewinding DeLorean Door Lock Solenoids
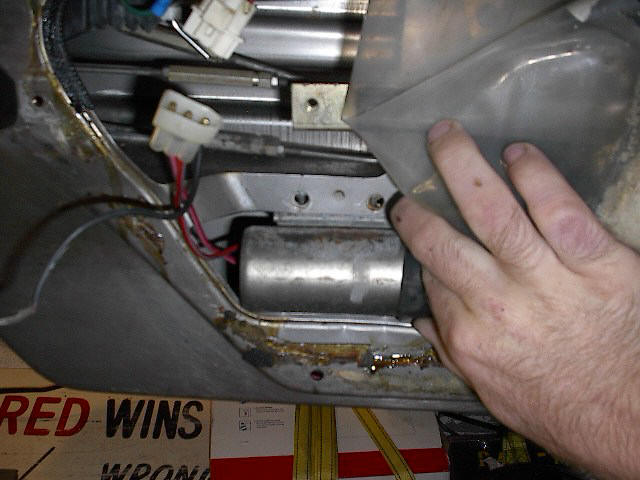
| Remove the lower door panel. Peel back the
plastic on the bottom rear, and you will see the door
lock solenoid... it's usually gold in color.
Unhook the wiring connector, and remove the two
Phillips head screws securing the solenoid. (Note: the
rear screw also secures the black ground wire.
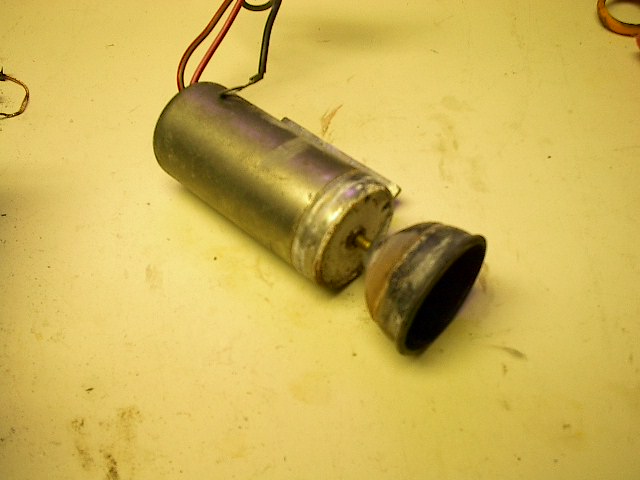
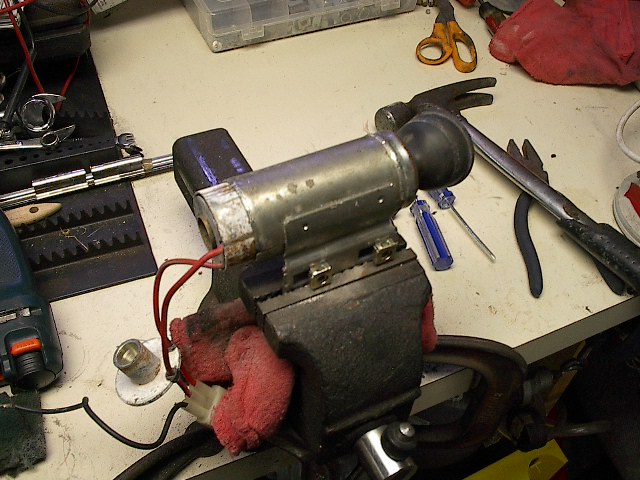
Carefully pop the rubber boot off of the front of the solenoid, and fold it inside-out.
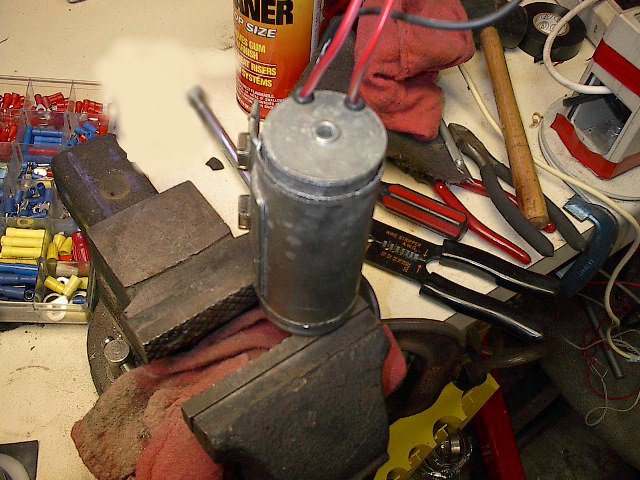
Using pliers, a bottle opener, or your choice of tools, carefully bend the rear of the case out to allow removal of the inner components.
With a little wiggling, the rear "top hat" will pop out.
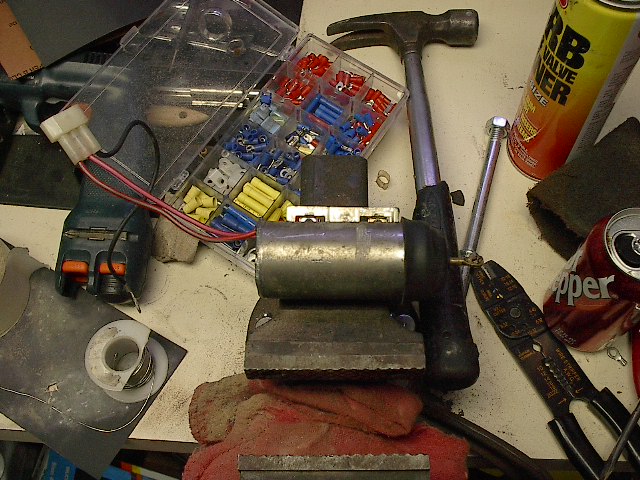
At this point, you may be able to push the whole internal assembly out through the rear. Mine required a small bit of coercing with a hammer and a drift. Tap lightly and the unit will start to slide out.
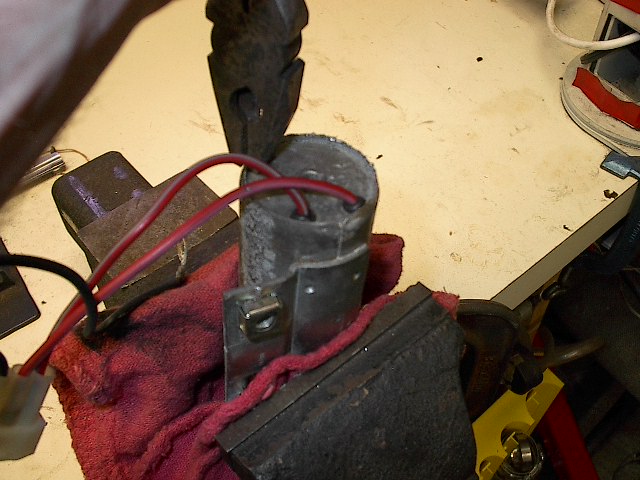
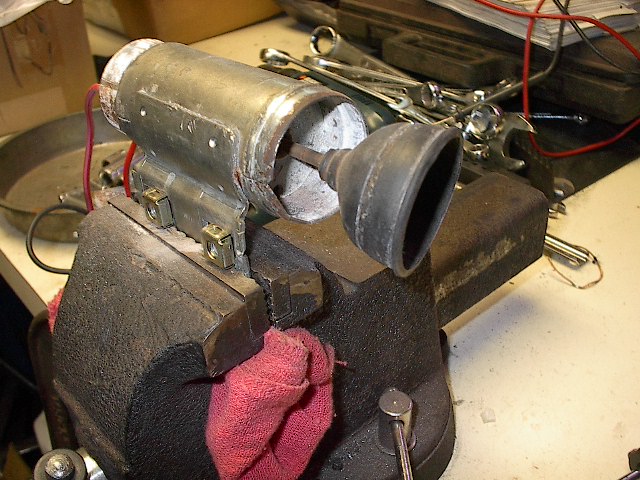
The inner assembly will look something like this. Note the heavy, white corrosion all over the internal components. You'll want to clean this up with a Scotch-Brite pad. The collars over each coil are split. A large screwdriver inserted and twisted in the split will open up the collar wide enough to allow you to remove it. Clean the collars, and set them aside for now.
Note the condition of the plunger assembly. You may also want to gently clean this with a Scotch-Brite pad if you notice any corrosion. The same goes for the sleeve it fits into.
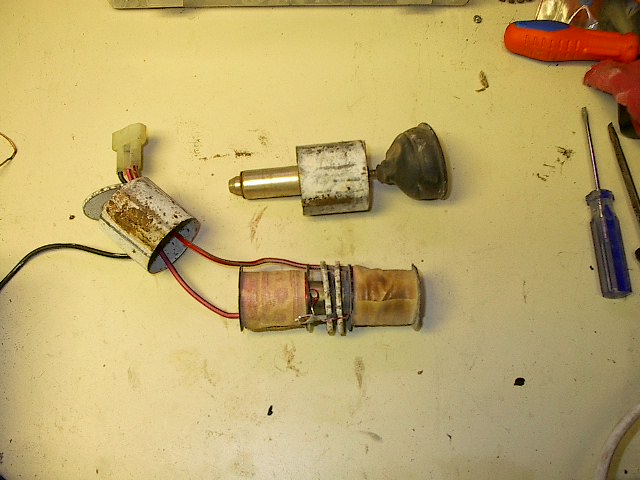
Snip the wires on one of the spools to allow its removal. Remove the covering tape, and unwind all of the wire from the spool and discard. CAREFUL! That wire can be sharp. Wearing gloves is highly recommended.
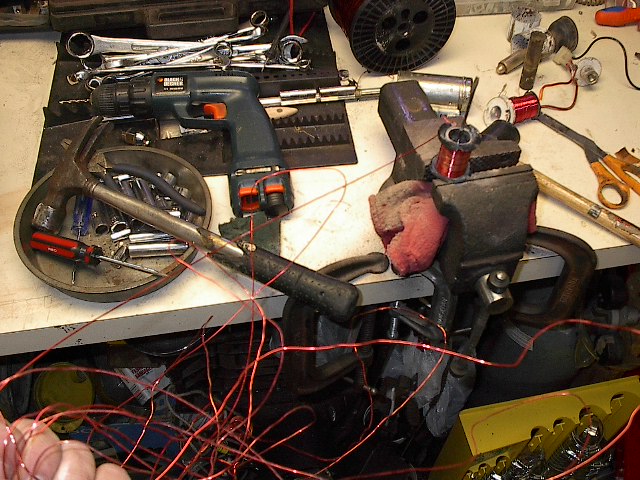
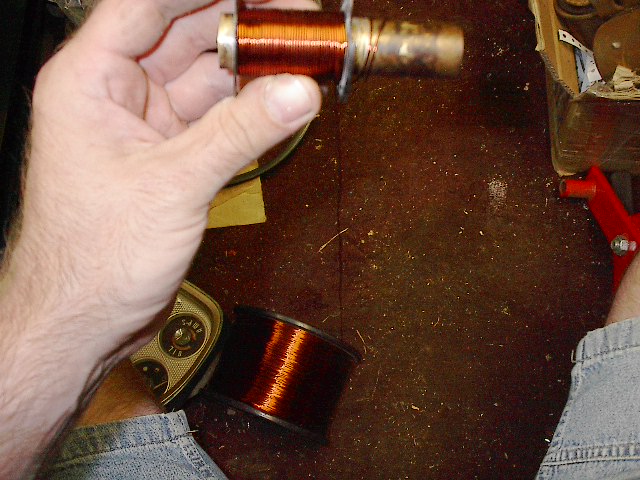
You will need to buy a 1 pound spool of #20 magnet wire. This is available at many alternator/starter repair shops. A 1 pound spool will leave you with enough for both solenoids, leaving plenty of extra wire to pass along to a friend.
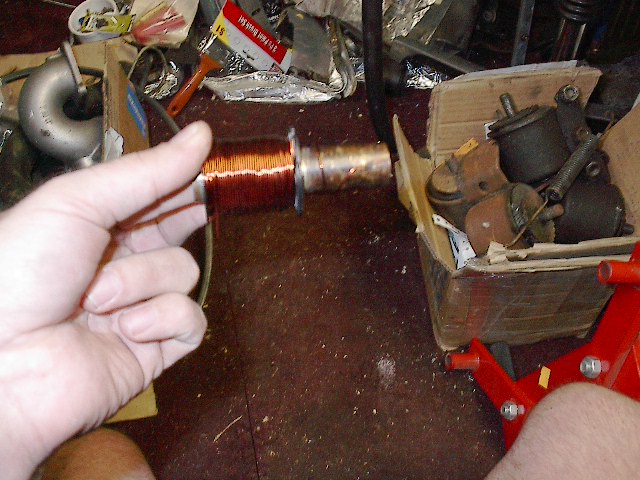
A completed spool looks like this. Keeping tension on the wire during winding helps keep the rows nice and neat.
Cut the wire, leaving about 6" of extra wire when done winding. Use masking tape to secure the wire around the spool. Now complete the second coil the same way as above.
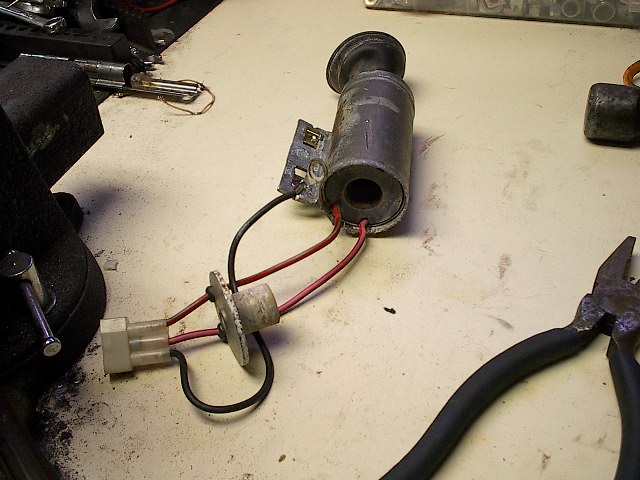
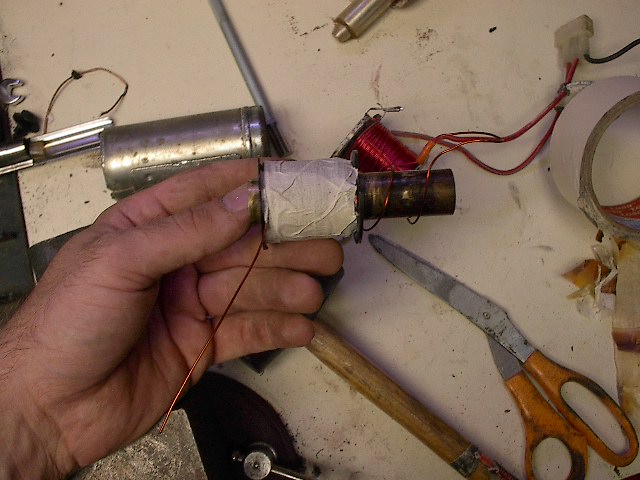
Thoroughly clean the large middle washers and the grounding washer/tab. You may want to use sandpaper to get them nice and shiny. Assemble the two coils onto the spool, with the notched end (inner most wire end) towards the center. The order is spool, washer, ground washer/tab, washer, spool. Align the small cutouts on the spools so they are all at the same position. Cut the starting end of the wire (the part going through the notch where you started winding) so it is just long enough to reach the grounding washer/tab. Scrape away all of the coating on the wire about 1/4" from the end to allow for a good ground. Failure to do this will result in a non-operative lock solenoid. Solder each coil's starting end to the ground washer/tab. Now you will need to crimp/solder the power wires to the other end of the wire (outermost). Scrape away all of the coating on the magnet wire about 1/4" from the end to allow for a good connection. Failure to do this will result in a non-operative lock solenoid. Fit the heavy power wires into the cutouts on the spools, and secure them with a small piece of tape to make reassembly easier.
Slide the split collars over the spools, and wiggle them until they seat nicely. The internal assembly is now complete. Insert the plunger into the bore of the coil assembly, and reinstall the whole internal assembly back into the solenoid housing. Add the rear "top hat", making sure the power wires fit in the grommets in their respective cutouts.
At this point, it's good to test the assembly. Use one of the mounting screws to secure the black ground wire to the solenoid. Hold the solenoid level, and have a helper operate the door lock on the opposite side of the car. It should function smoothly in both directions. Carefully bend the back of the solenoid casing back over to secure the internals.
Reinstall the solenoid in the door, following the adjustment procedures outlined in the service manual. You'll want to make sure it's adjusted correctly, or it will not operate as expected. Don't forget to hook up the black grounding wire under the rear screw.
Reconnect the wiring harness, and reinstall the lower door panel. That's it. You now have renewed door lock solenoids for less than $10. |
Copyright ©
ProjectVixen.com. All rights reserved.
Opinions expressed in posts reflect the views of their respective authors.
DMCForum Mailing List Archive
DMCNews Mailing List Archive
DMC-UK Mailing List Archive
This site contains affiliate links for which we may be compensated